We love answering your question about this topic. If we were to be your provider, you can access instant help using our live chat from our website, Skype (18 hours per day) toll-free phone tech support (USA), and 24/7 support ticket system. Contact us today for more details.
*************
YES!
One of the new cool features with Centova Cast V3 is the ability to split your station into multiple streams. Many broadcasters want a high and low bandwidth stream and this is the perfect way to do that. The steps below will show you how to set up a second stream running off the same auto dj.
STEP 1
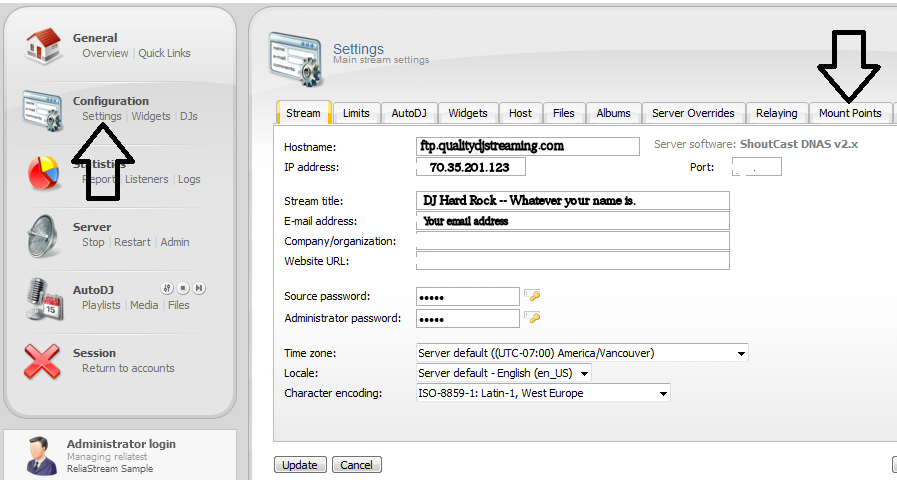
You will need to log into your Centova Cast V3 control panel. Once you are logged in you will want to click the Settings link. This link is located on the left side of your screen and it is in the Configuration area (as shown). Once you click settings you will want to locate the Mount Points tab and click on that tab.
STEP 2
Once you click on the mount points tab you will see your Current Mount Points. Simply double click on /stream to open 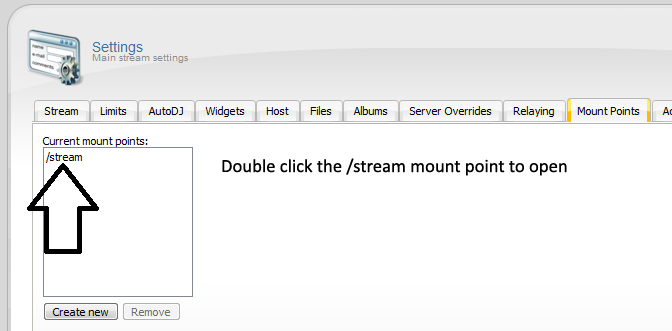
STEP 3
Once you double click on /stream that mount will open up. Click on the AutoDJ Settings tab. This is where you will adjust your /stream mount. In this demo the max kbps rate we can go is 192 kbps. This will change based on which Quality DJ Streaming Centova plan you purchased. In this demo we are working off the built in auto dj software. The /stream mount is your main stream so we set Use AutoDJ option to YES. Audio Encoder is either MP3 or AAC+. If you set this to MP3 be sure you have purchased the Winamp MP3 license and entered that into your account. We are using AAC+ in this demo because there are no fees to run an AAC+ stream. As you can see below the Bit Rate area has a slider. This allows you to adjust your main stream to your desired setting. We setting our main stream to 128 kbps. 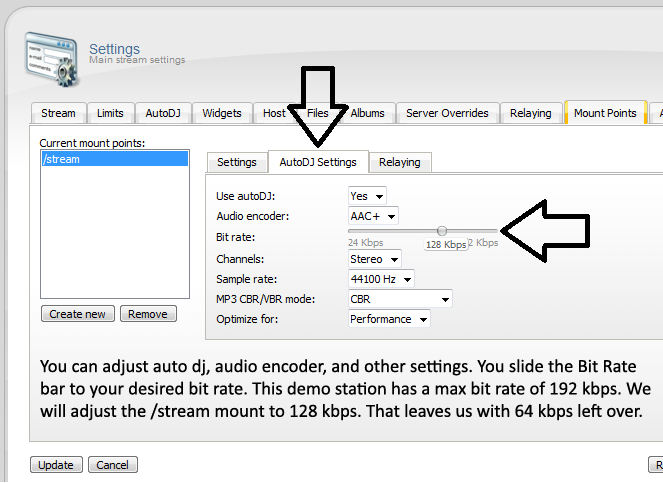
STEP 4
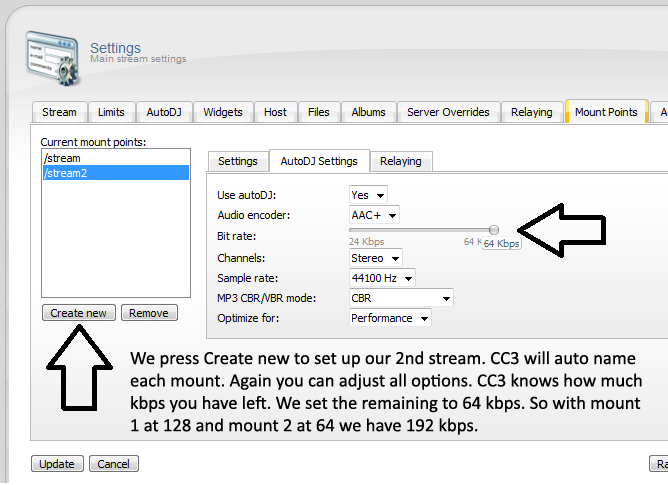
Now you are ready to set up your 2nd mount point or second stream. Press Create New button and this will create your second mount (/stream2). In this demo we are going to continue to work off of the auto dj we currently have running on the /stream mount. That means we are setting the Use AutoDJ to YES again. Audio encoder can be MP3 or AAC+ and we are using AAC+ in our demo. Now the Bit Rate area has changed only showing what you have left or what you have to spare as far as kbps go. In our demo we have 64 kbps left and we are going to use it all so we slide the bar to 64 kbps. Be sure to press Update when you have your settings done.
STEP 5
Once you have everything set up and saved (pressed the Update button) you will want to do a full server restart. This will renew all your server settings.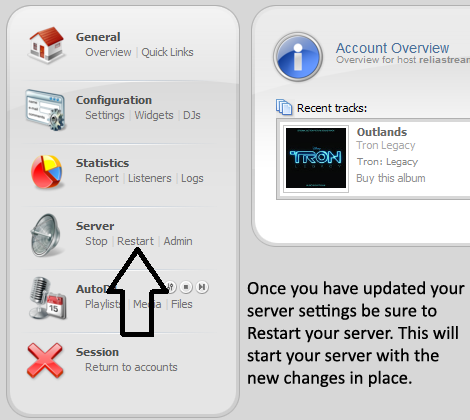
------------------------------------------
For great service and great prices, check out:
WHMSonic Plans Centova Plans
------------------------------------------

©2015 Quality DJ Streaming (qualitydjstreaming.com) QDJS. Copying this material is strictly prohibited


